If you’re planning a trip to Guatemala, you’ve likely heard that the Acatenango volcano hike is a must-do adventure! It’s the kind of activity that requires preparation, and reading this guide is your first step. Had we known what we know now, our experience hiking Acatenango would have been even better. This is bound to be one of the most incredible experiences of your life, so let’s dive into everything you need to know before embarking on this epic hike:
- It’s a Challenging Hike
- This Hike is for Everyone
- Guides for Different Paces
- Ways to Make the Hike Easier: $$
- Clothes – Prepare for Temperature Changes
- Hydration
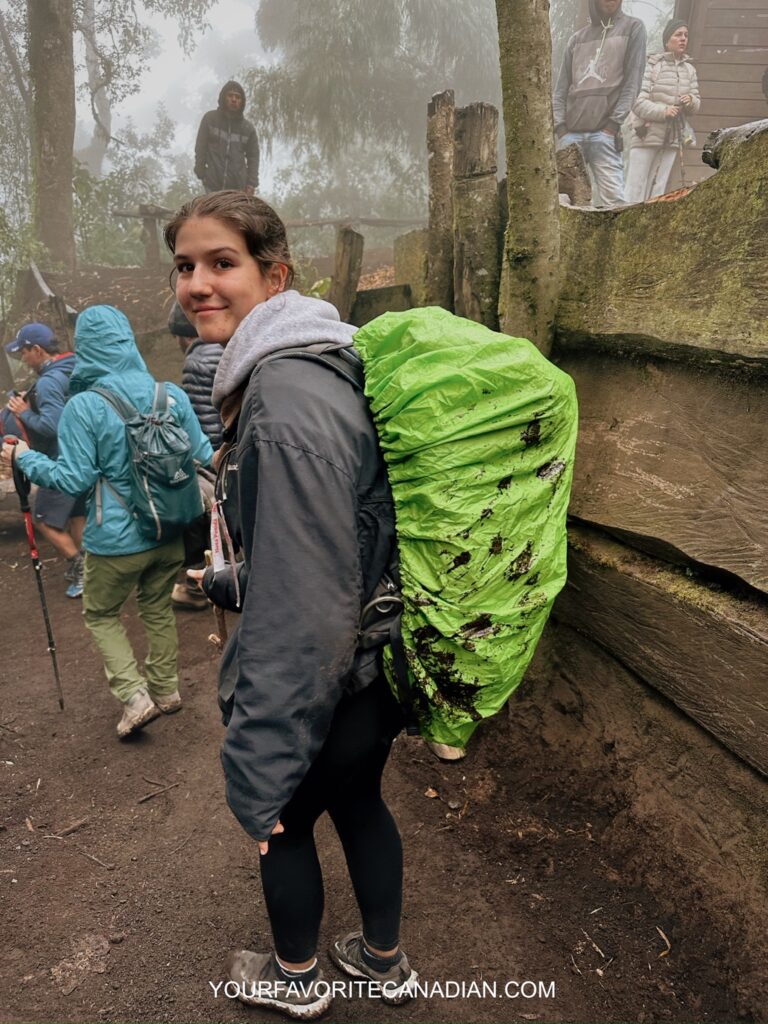
- Day Backpack
- Food
- Shoes – Do You Need Hiking Boots?
- Medication – Altitude sickness
- Hygiene Essentials
- Flashlight/Headlamp
- Is it Worth it to Do the Extra Fuego?
- Do I Need to Take All My Things With Me? Where Can I Leave My Stuff?
- Our Completely Transparent Experience – What Could Have Been Better?
- How to Book the Excursion and Prices
- Hike/Trip Breakdown – Booking with Selina
- Sunrise Hike
1
Acatenango Hike Difficulty: Are You Fit Enough?
It’s a Challenging Hike
We didn’t realize how difficult the hike would be because we didn’t do any prior research. While waiting for our shuttle at the hostel, a fellow traveler mentioned we were about to face one of the hardest physical challenges of our lives. She was right! It had been three days since her hike, and her body was still recovering, even though she was in excellent physical condition.
This Hike is for Everyone
Despite the difficulty, this hike is achievable for almost anyone. I (Jezabel) am in great physical shape, working out at the gym five times a week. Even so, this was the toughest physical challenge I’ve ever faced. But the reason why anyone can do it despite the difficulty is there’s no rush!
People of all ages and fitness levels attempt this hike, and the common factor among everyone was determination.
Guides for Different Paces
Our group had five guides, and at one point, we splitted into three smaller groups: the fast hikers, the mid-paced, and the slower ones. There was no pressure to go quickly, and we took our time in the middle group, enjoying the journey without feeling the need to push ourselves too hard.
Ways to Make the Hike Easier: $$
There’s no way to improve your leg strength overnight, but you can make the hike easier by paying a guide to carry your backpack or even hiring a horse to take you to the top.
While we didn’t opt for these services, we inquired about the prices. Rates vary based on the guide and the size of your bag. You can even choose to pay for help just during the final two hours of the hike, as one traveler we met did. She paid 200GTQ (about $35 CAD) for two hours of assistance. Riding a horse all the way to the top costs around $75 USD, and taking a car can cost approximately $500 USD for four people.
2
What You Must Bring for the Hike
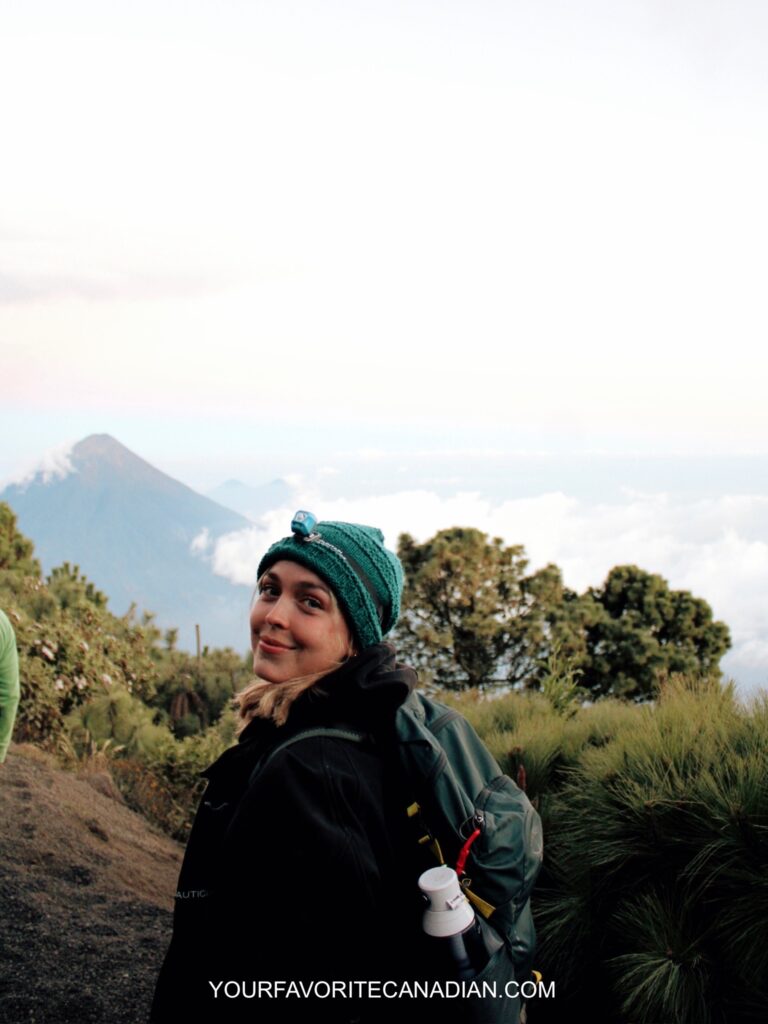
Clothes – Prepare for Temperature Changes
At the start of the hike, you’ll be hot and sweaty. As you ascend, the temperature drops significantly. I recommend dressing in layers—start with shorts and a T-shirt but pack long pants, a long-sleeved shirt, and a hoodie or vest.
At the top, it gets freezing. Even with my Canadian toughness to the cold, I think you would need a winter coat, hat, gloves, and warm boots. Having all this quality warm equipment is pretty impossible, but at least most tour companies provide warm clothing for rent or loan, so be sure to check what’s available.
Extra socks: Bring 2-3 extra pairs for hygiene and warmth.
Hydration
Most tour companies expect you to bring your own water—there’s none available on the volcano. You’ll need at least 3 liters per person.
Tip: A hydration pouch is much easier to manage than multiple plastic bottles. With it, you can sip water regularly as you hike, reducing the risk of cramps and dehydration.
Day Backpack
A lightweight, comfortable backpack is essential. I used the Osprey Hikelite 18L, which was perfect, even though I had to hang my coat outside the pack. It’s worth investing in a bag with space for a hydration pouch.
If your budget doesn’t allow for an Osprey, aim for a pack with similar features: lightweight, comfortable, and hydration pouch-compatible.
Food
While food is provided on the guided tour, I highly recommend bringing extra snacks like granola bars and nuts. Your body needs fuel, and extra snacks could make a big difference in your energy levels.
Shoes – Do You Need Hiking Boots?
Hiking boots are ideal, but if you only have regular sneakers, you’ll still manage. However, be prepared for some slips and falls on the slippery terrain. While Leo and I fell a few times, we weren’t hurt—just a bit embarrassed!
Medication – Altitude Sickness
You’ll be sleeping at the top of a volcano, so it’s not the time for stomach problems. Bring medications for diarrhea, headaches, and altitude sickness.
At 3,976 meters (13,045 feet), altitude sickness is a real risk. Symptoms include headaches, dizziness, fatigue, shortness of breath, and nausea. Stay hydrated, eat well, and consider getting altitude sickness medication before leaving for Guatemala.
Hygiene Essentials
The toilet situation is less than ideal, so bring extra toilet paper and wet wipes. For personal hygiene, stick to the basics: toothbrush, toothpaste, and wet wipes for your face, feet, and body.
Flashlight/Headlamp
A flashlight or headlamp is essential, especially if you’re planning to hike to Fuego. The hike is done in total darkness, so a headlamp will free up your hands and make the hike much easier.
Stay connected! Follow us on social media for exclusive content & updates on our travels.


On our website, you’ll find all the essential information and tips, while on our social media, you’ll get even more – including personal experiences, funny moments, stunning videos, and much more!
3
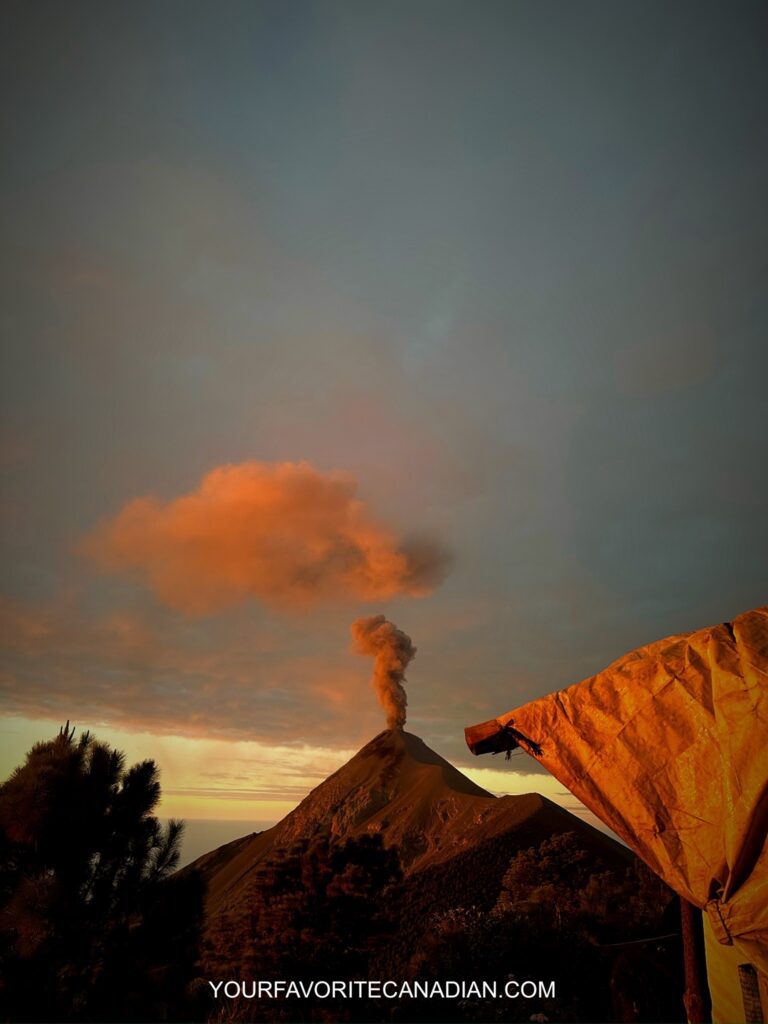
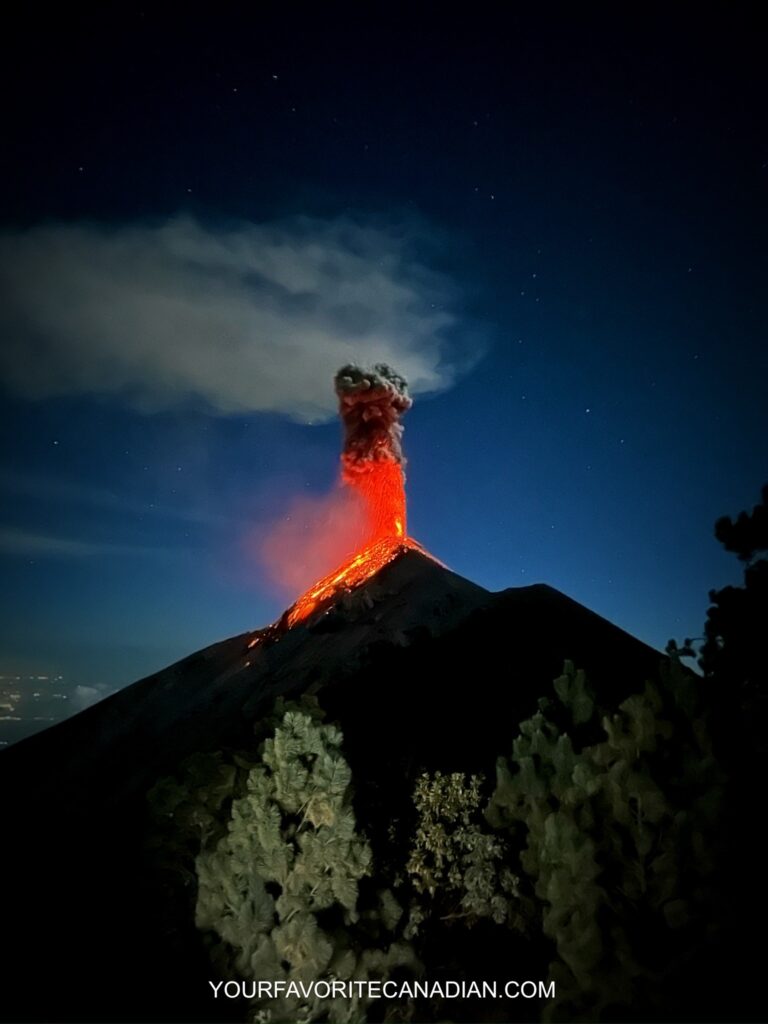
Is it worth it to do the extra Fuego?
I sincerely believe there is no right or wrong answer here. However, I’ll share a few important things to consider to help you make your decision:
- You’ll need to pay an extra 200GTQ, which is around $36 CAD.
- It’s an additional 4 hours of hiking, and it’s always extremely steep, right after completing the Acatenango hike, which takes about 5 to 6 hours.
- You may not have time to eat dinner before starting the Fuego hike, meaning you’ll do around 10 hours of hiking with just breakfast and lunch, which will definitely be long gone by the time you start this second hike.
- Upon reaching the top of Acatenango, you might experience symptoms of altitude sickness. If this happens, the second hike will be even more challenging.
- Unlike the first hike, you won’t have the luxury of setting your own pace. The group is smaller and must stay together, so when the group moves, you move. Depending on the company, this hike might be done entirely in the dark, and falling behind isn’t an option.
- There’s no turning back or getting a horse. Once you start this hike, you must finish it.
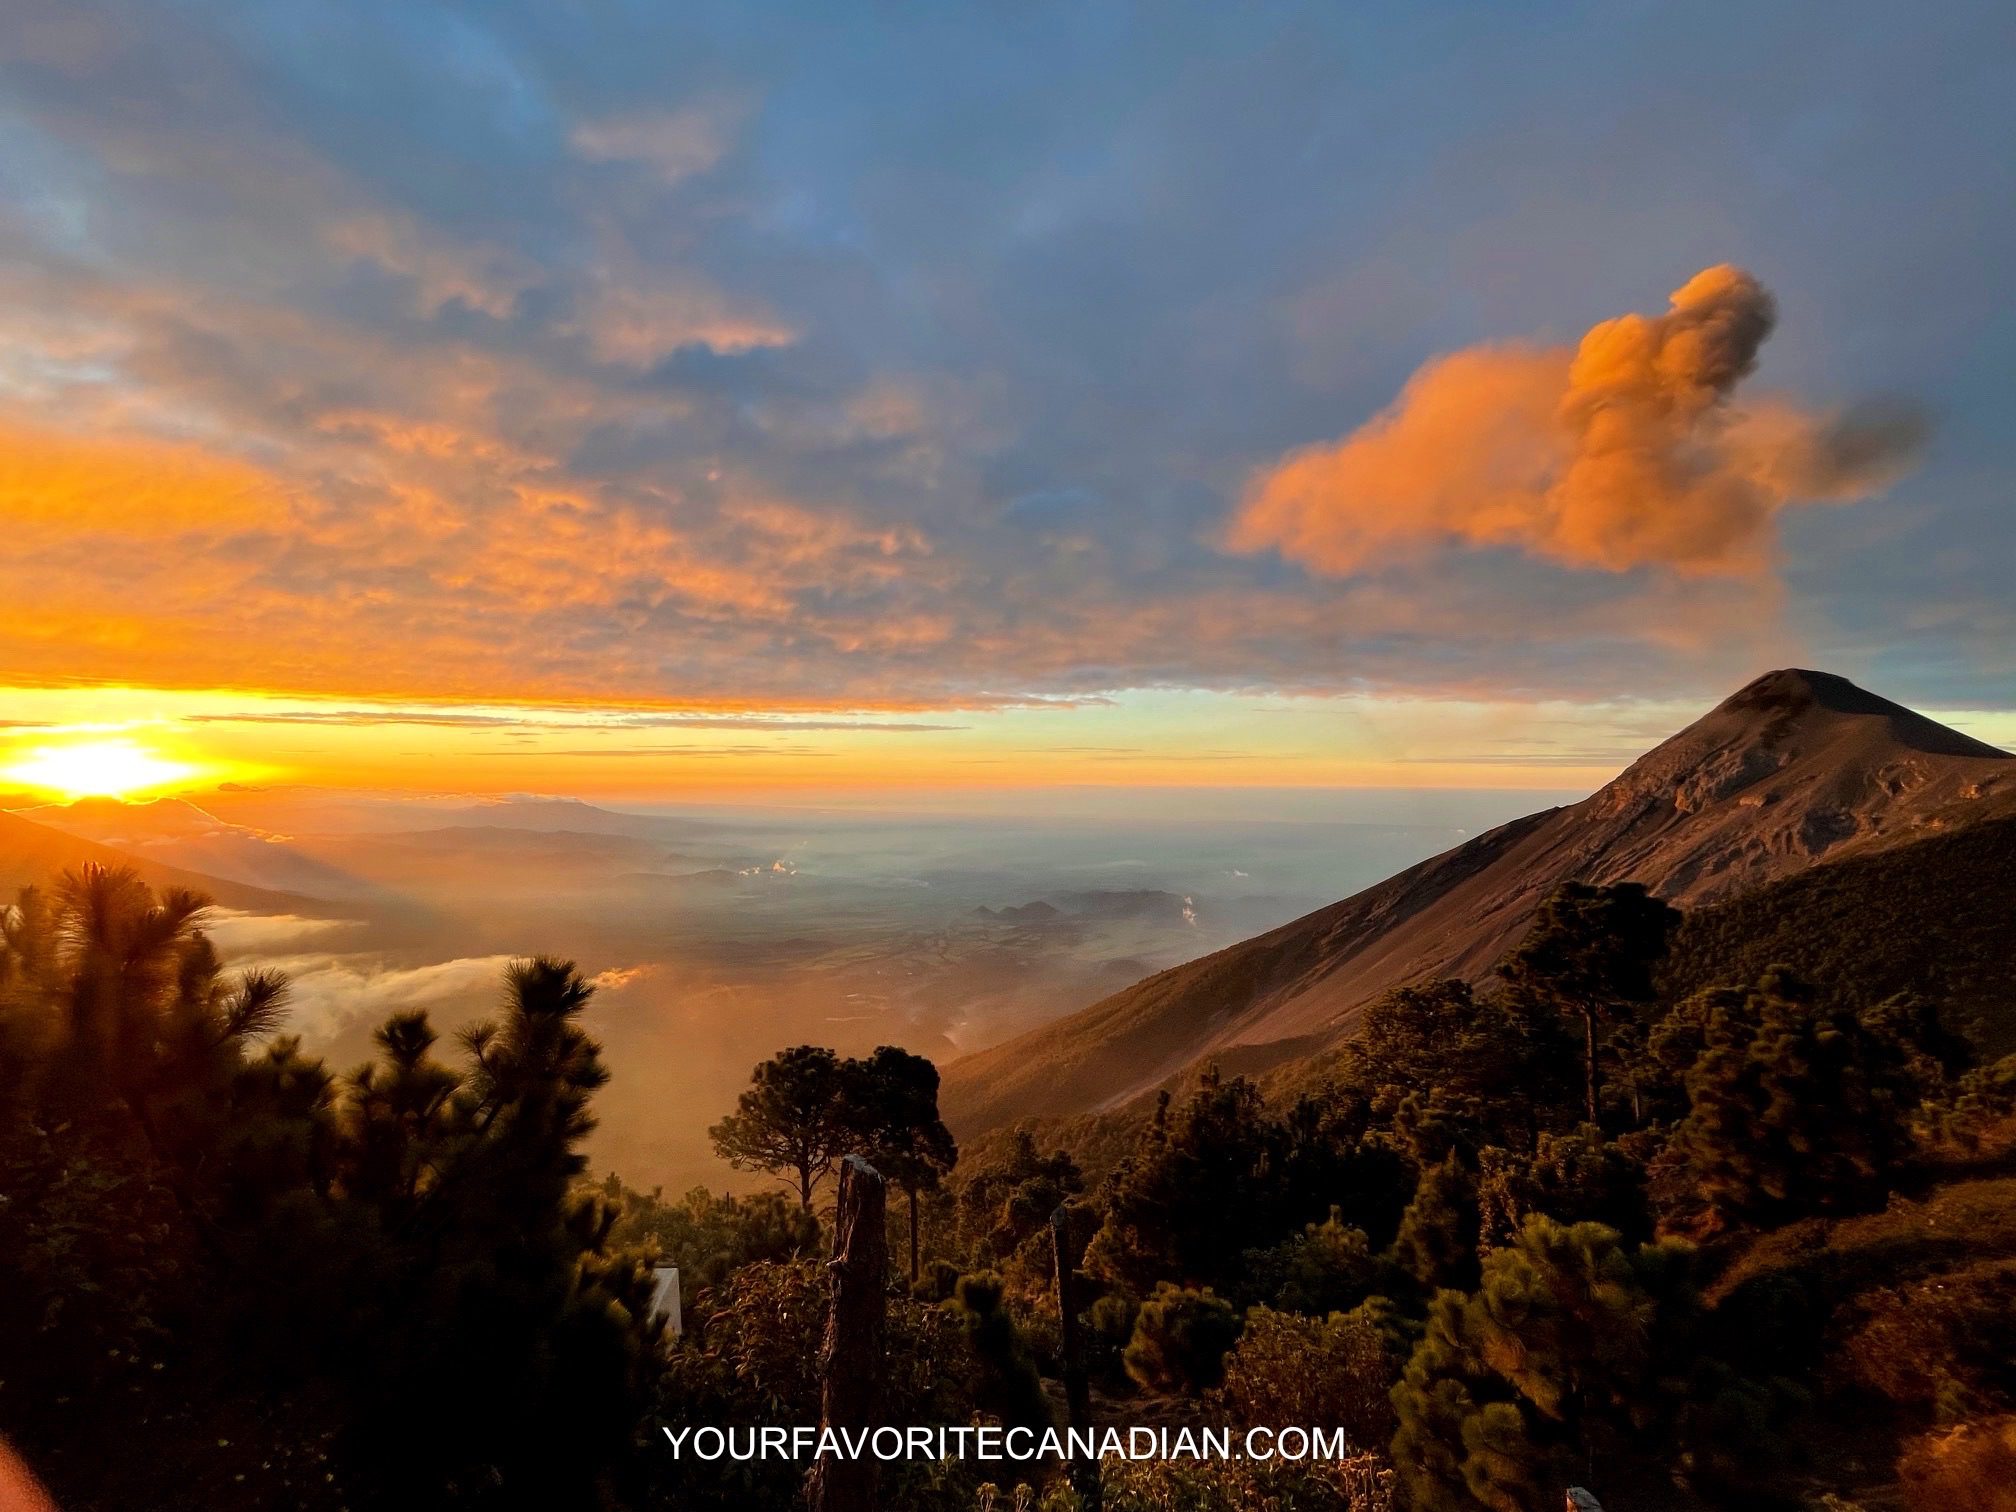
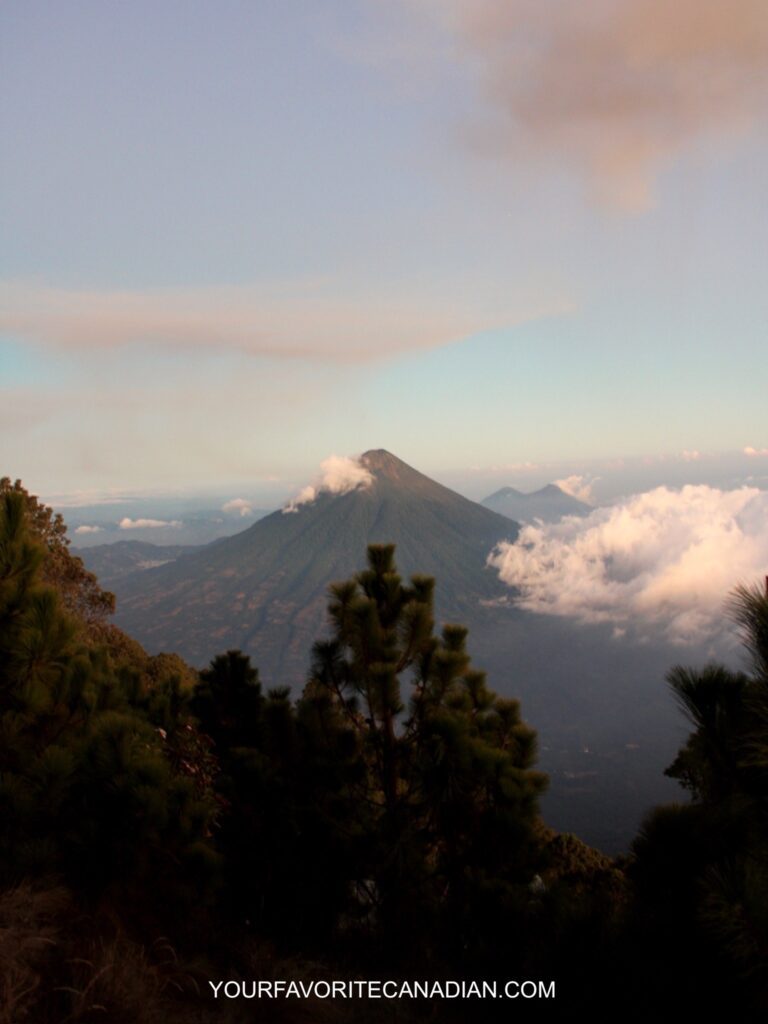
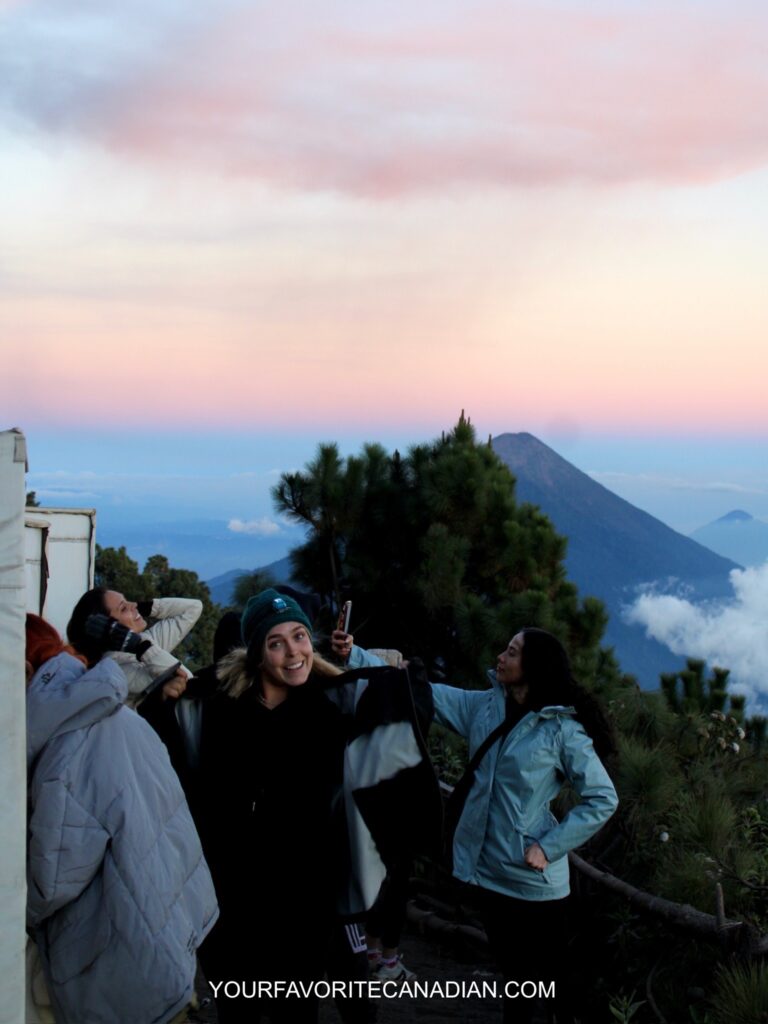
What About the View?
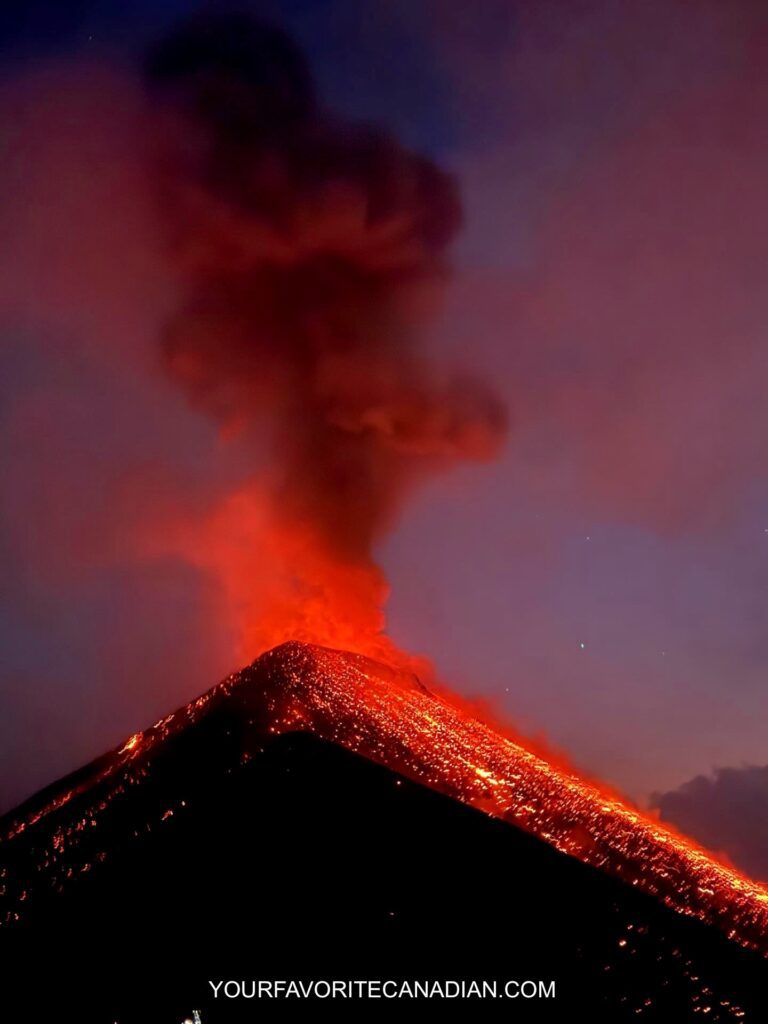
The view from the base camp is stunning. Our group reached the summit around sunset. In my opinion, the biggest downside to doing the extra Fuego hike is that you miss this beautiful view during the 4 hours of hiking. While you’re struggling physically and mentally, the people who stayed at camp are witnessing 10 to 20 times more volcanic eruptions than you will see up close.
That being said, the experience of seeing eruptions up close is something that words simply cannot capture.
The Ultimate Question to Ask Yourself:
Would you rather:
- Struggle less physically and see far more eruptions, but from a distance, or…
- Push yourself physically like never before, see fewer eruptions, but get so close to an active volcano that it feels surreal?
Do We Regret Doing the Extra Fuego?
Not at all. The truth is, I wish I could’ve experienced both! I would have loved to stay at base camp, fully enjoying the view and the moment. But at the same time, I don’t regret the challenge of pushing my limits and experiencing the eruptions up close—it left me feeling incredibly proud and fulfilled.
4
Do I Need to Take All My Things With Me? Where Can I Leave My Stuff?
Absolutely not! We saw a couple attempting the hike with all their travel luggage, and they were struggling severely. Most hostels and hotels in Antigua are familiar with tourists doing this hike, so it’s very common to leave your belongings at your accommodation, even if you’re not staying the night. They usually have a locked room where you can store your bags. If not, the tour company’s shop will provide a space to leave your things, and it’s free!
5
Our completely transparent experience – What could have been better?
This experience will stay with me for the rest of my life. It was the hardest physical challenge I’ve ever faced, but also the most rewarding. The sense of accomplishment, pushing your limits, and being rewarded with such a unique view is indescribable.
However, here’s what could have been better:
- Our group was the last to finish the hike. I wish we had booked with a company that arrives earlier at the top of the volcano.
- I wish we had brought extra food. I ate very little during the entire hike, which left me feeling weak and too exhausted to even talk.
- I should have taken altitude sickness medication. Unlike Leo, who had no symptoms, I struggled with breathing and felt like my lungs were going to explode. Keep in mind that only a minority of people experience this, but it’s something to be prepared for.
6
How to Book the Excursion and Prices
Note that each company or accommodation includes different things in their prices. Be sure to check what’s included before booking.
Fees: Everyone must pay a government fee of 100GTQ for Acatenango and the extra Fuego hike is 200GTQ. These fees are usually not included in the tour, so make sure to ask before booking.
There are several ways to book the excursion:
- Through Your Accommodation
Most hostels offer Acatenango excursion packages. We booked ours through our hostel, Selina, and it cost us $70 CAD for the entire trip (round-trip private transportation, the hike, accommodation at the top of Acatenango, and three meals). This is in addition to the previous fees talked about. Keep in mind that Selina was one of the cheaper options, which is why we were the last group to start the hike and the last to reach Fuego.
Booking through your accommodation is convenient if, like us, you’re making last-minute plans. Many companies were fully booked, and this was our only option.
- Company Tours
We heard great reviews about these tour companies, though we didn’t book with them directly. Below are the details with links to their websites:
OX Expeditions:
- 4.6 stars on Google
- Acatenango Overnight Hike: $99 USD / $136 CAD
- Double Whammy Volcano Tour: $139 USD / $190 CAD
- Click here for more info!
Tropicana Tours:
- 4.8 stars on Google
- Acatenango Volcano Hike: $85 USD / $117 CAD
- Click here for more info!
Wicho’s and Charlie’s:
- 4.7 stars on Google
- Shared Cabin or Acatenango 4×4 Off-Road options: $119-$170 USD
- Click here for more info!
Chabad Antigua:
- 4.8 stars on Google
- Jeep tour to Acatenango: GTQ1500 / $265 CAD
- Click here for more info!
7
Hike/Trip Breakdown – Booking with Selina
Here’s a timeline to help you visualize the experience:
- Breakfast is included at Selina, so we made sure to eat before starting.
- You’ll be picked up by a shuttle at your accommodation (Selina in our case).
- The shuttle stops around Antigua to pick up others.
- You’ll stop at a shop to collect your meals, a coat, a hat, and gloves (which you’ll need to carry).
- It takes about 1–1.5 hours to get to the start of the Acatenango hike.
- You’ll have the option to rent walking sticks for an additional fee. They’re helpful, but not essential.
- There will be 2–3 breaks during the hike, including one for lunch.
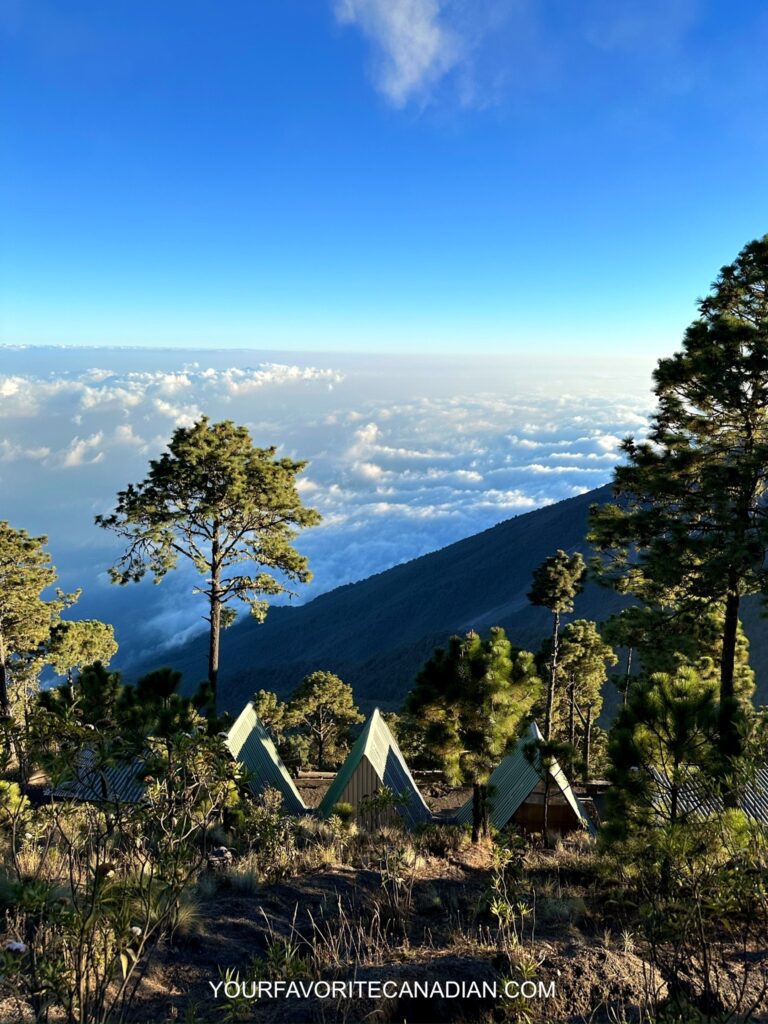
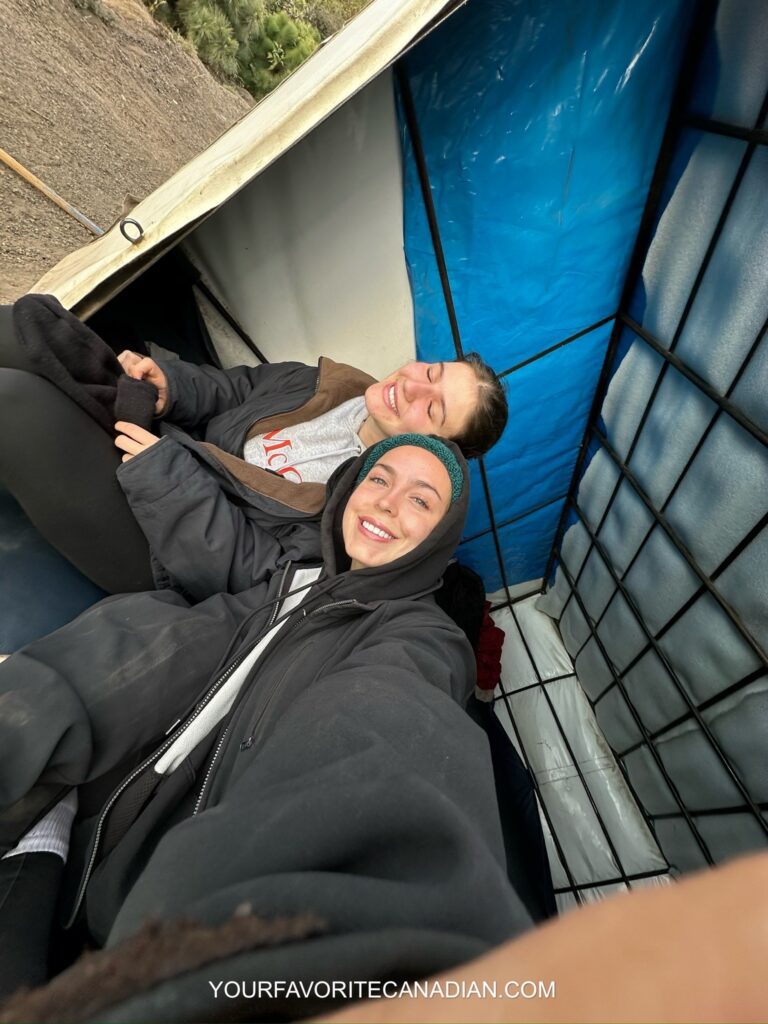
- It takes 5–6 hours to reach the base camp. Tents sleep six people, usually separated by gender unless you agree otherwise.
- If you opt to do the extra Fuego hike, you’ll have about 30 minutes to rest before starting again. If not, you’ll enjoy the sunset and dinner.
- The Fuego hike takes about 2 hours each way, with around 30 minutes to view eruptions.
- Afterward, you’ll eat a warm dinner before heading to bed.
- The sunrise hike is optional and free when booking with Selina.
- In the morning, you’ll get breakfast and leave early.
- The descent is much faster, taking around 3 hours.
- You’ll return to Antigua by noon.
8
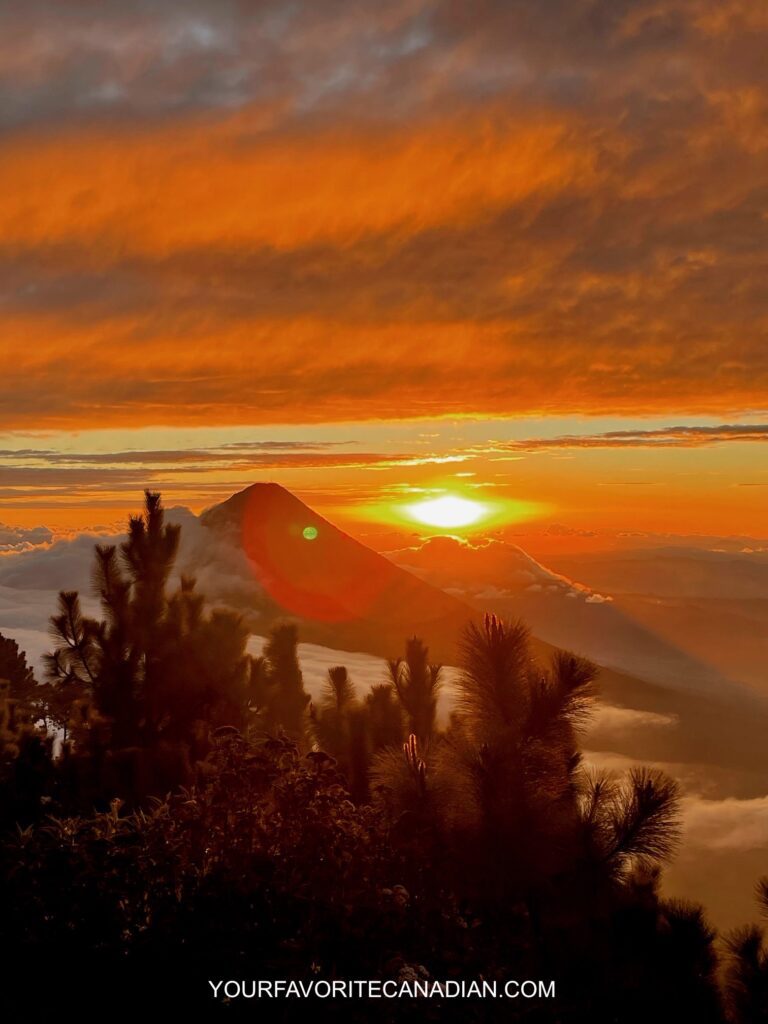
Sunrise Hike
The sunrise hike is available with most companies. If you did the extra Fuego hike like us and went to bed around midnight, waking up at 4 am might feel impossible. Though we couldn’t manage it, those who did said it was breathtaking. If you can, it’s highly recommended!
Like this post? Pin it for later!
Don’t want to miss out on our latest articles? Be sure to subscribe to our website, and you’ll receive a notification every time we publish something new!